

As much as I enjoy watching stop motion movies, it can also be fun to create your own. With technology there are many programs and apps to make the process much easier, so that anyone can make a stop motion animation.
One easy tool to use for this is Google Slides. Many times we think of Slides as just a program for creating multimedia presentations. However, with just a few tricks you and your students can actually use Google Slides to make stop motion movies.
This can be a creative and fun way to:
- Tell a new story
- Retell a story read in class
- Reenact a historical event
- Demonstrate a scientific concept
- Explain how to solve a math problem
- Define a vocabulary term
- And much more
Session Resources
- Slideshow - Google Slides link
- Session Agenda - Google Doc link
Stop Motion Examples
For this blog post, I created two examples of animation with Google Slides. One uses the more traditional approach of combining photographs, while the other uses shapes and text.

For my first example I used stop motion to define a vocabulary term, in this case the word "identical". To do this I used Lego's to act out a scene (my own "Lego Movie"!). You can view the final product by clicking below:
- Vocabulary Term: Identical - Google Slides link

For my second example I animated shapes and text and teach how to calculate the area of an irregular shape. No traditional photographs were used for this example. To see the animation, click the link below:
- Area of an Irregular Shape - Google Slides link
Overview
Below are the basic steps for creating your own Google Slides stop motion animation. We will look at most of the steps in more detail further down in the blog post.

- Create your Google Slideshow as normal.
- As needed, insert images by taking a snapshot with your webcam.
- As needed, insert shapes, text, and other items.
- To save time, make copies of slides and make small changes to the items on the slide to simulate movement.
- To make certain slides last longer, make multiple copies of the slide.
- When done, use "Publish to the web" option to get playable link for your slideshow.
- Adjust the "Publish to the web" link to shorten the time between the slides to make them appear animated.
- Share the link with others to view!
If you are not familiar with the basics of using Google Slides, you can learn more with the help guide below:
- Using Google Slides - Google Document link
Inserting Images
If you want to go with the traditional approach for stop motion animation, you will want to insert photos into your slideshow. Certainly these images can be taken with digital cameras, phones or such, but you can save a lot of time by simply using a webcam built into or connected to your laptop, Chromebook, or computer. Google Slides has a handy option that lets you insert images directly from your webcam.
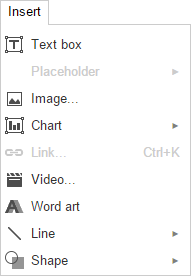
- Click "Insert" in the top menu bar.
- Choose "Image" from the drop-down menu.
- Then choose "Camera".
- Click the camera button when ready, and then click "Insert" to insert the photo into the current slide.
- As needed, you can resize the photo to fill the slide.

In between photos, you will now want to make small changes to your scene. This could include moving your lego characters, clay models, action figures, or such. If needed, you can also move your webcam to zoom in, zoom out, or move around the scene.
Keep repeating this process to make all the slides you need to make your movie.
For my lego movie I used the Ipevo Point 2 View camera. It is a very affordable USB camera than can be connected to laptops, Chromebooks, and computers, and is easy to adjust the height and angle. Of course you can just use a built-in webcam as well, but an external camera can make movement a bit easier.

Inserting Other Items
 Instead of using photos, you can also create stop motion animations by simply inserting and moving clipart, shapes, text boxes, and such. Or you can combine these items with your photos by inserting them on top of your pictures.
- Insert items by clicking the "Insert" menu then choosing "Shape", "Textbox", "Line", "Wordart", or such.
- When done, make a copy of the slide by clicking "Slide" then "Duplicate slide".
- Now click on the items you inserted and make small changes to them to make it look like they have moved between slides.
- This could include moving the item, rotating the items, or resizing the item to make it bigger or smaller.
Keep repeating this process to make all the slides you need for your animation.
Making Slides Last Longer
When your slideshow runs, each slide will last the same amount of time. However, sometimes you may want your movie to linger on a certain scene for a longer time. Although you can't make a specific slide last longer, you can make it look like it does. The way to do this is to make multiple copies of the slide, without making any changes to it, so it looks like the scene is lasting longer.
- Select the slide you want to last longer.
- Make a copy of the slide by clicking "Slide" and "Duplicate slide" or copy and paste the slide.
- Repeat this multiple times to make 5 or 10 copies of the slide (for example).
Later when the slideshow runs, it will look like the movie has paused on this slide for longer.
Publish to the Web
When you are done creating your stop motion animation, you now need to get a special link for people to view it. Instead of simply sharing your slideshow, you will want to use the "Publish to the Web" option. This will allow the slideshow to open full screen and start automatically.
- Click "File" in the top menu bar.
- Choose "Publish to the web" from the drop-down menu.
- This will open the "Publish to the web" window.
- Check the box for "Start slideshow as soon as the player loads".
- Also check the box for "Restart the slideshow after the last slide".
- Now click the "Publish" button and click "OK".

Finally copy the link provided for the published slideshow.

Speed up the Slideshow
By default the "Publish to the web" link will open the slideshow fullscreen and start it playing with each slide advancing every 3 seconds. That sounds quick, but it is way too long to give the illusion of animation. To make the stop motion animation look like it is moving quickly, you need to edit the link to reduce the delay between each slide.
When you look at the "Publish to the web" link, you will see the following at the very end:
&delayms=3000
This tells the slideshow how many milliseconds to wait in between each slides. There are 1,000 milliseconds in 1 second, so the default of 3,000 means there is a 3 second delay before moving to the next slide.
You can speed up the slideshow by making this number smaller. For example, if you change the value to 250 that would be 250 milliseconds, or one-fourth of a second. This would mean there would be four slides displayed per second, which would be much faster and give the illusion of animation.
&delayms=250
You will need to experiment with different values to find the best speed for your slideshow to produced the desired effect.
Share the Link
Now that you have edited the "Publish to the web" link to make your slideshow move much faster, you are ready to share that link with others. Anyone who clicks the link will be able to view your stop motion animation movie.
 You can share the link in many ways:
- Put the link on your website
- Post it on social media
- Email the link to others
- Put the link inside a Google Document
- Make a QR Code or shortened URL
Bonus
If you want to go one step more, another option is to make a video out of your final stop motion animation using a screen capture tool such as Screencastify. See my earlier blog post for ideas on how to do that here:
- 7 Super Screencasting Activities for School - Blog Post link
Conclusion
We are always looking for creative ways for students to share their ideas and express their understanding. Stop motion animation can be one more fun option for a student learning product. With Google Slides it can be an easy process for students who enjoy telling a story one frame at a time!
If you have any examples of student-created or teacher-created animations with Google Slides, feel free to share in the comments below.
Post by Eric Curts. Bring me to your school, organization, or conference with over 50 PD sessions to choose from. Connect with me on Twitter at twitter.com/ericcurts and on Google+ at plus.google.com/+EricCurts1
Hey Eric - great post! I also use this tip in my Design Thinking training for teachers and students on how to make students' work come to life. I am sharing my link here (http://gg.gg/4hinw) on some other simple tips that students and teachers can use to animate projects and provide context. I hope they help!
ReplyDeleteLove this so much! Can't wait to show students! Thanks, Eric!
ReplyDeleteHere is something similar in slides I do with my students: https://sites.google.com/site/apps4businessed/google-apps-101/3-5-google-slides
ReplyDeleteThanks for sharing Kurt! Those are awesome examples of student work!
DeleteEric,
ReplyDeleteWe were looking for a solution for stop motion animation on Chromebooks. We were not pleased with the limited options in the Chrome web store. Thank you for sharing this idea.
Yesterday, I created a video and a graphic design practice with Google Slides shortcuts. Video - https://youtu.be/JSEyD-d6Uh4 Practice - https://goo.gl/2gYB0T
I used this idea but used the extension "DriveSlides" to copy all pics into a slide show in one step. It works...but is glitchy. Doesn't always work on the first try. I love the idea!
ReplyDeleteParents need to monitor teens to know where the kids are right now. Click teensafe phone tracker for more info.
ReplyDeleteThis is a great idea that I had never thought of before. Thanks for something new to try and use!
ReplyDeleteHey Eric. Thank you so much for providing quality information on how to use G Suite apps. I will share this with the rest of the faculty during our meeting. Awesome!
ReplyDeleteSo excited for Daredevil season 3. I just wish they would hurry up and bring out the season as fast as possible especially because they left the last season with so many unanswered questions.
ReplyDeleteReally hyped to see Charlie Cox as Matt Murdock and Deborah Ann Woll as Karen Page. For more details Click Here Dailyhits Blog
Nice blog. I am sure others will also be interested to know how to hack someones snapchat.
ReplyDeletehttps://goo.gl/2Cbt3t Had a great time trying this animation tip this afternoon. It is a welcome back from our class mouse. I hope the kids will get excited about creating one themselves. I love finding new ways to use slides. Thanks for sharing.
ReplyDeleteLove these examples! I will be trying my hand at some soon! Thank you for sharing.
ReplyDeleteThank you! This will be great in our After School enrichment program. I am now in search of a planning worksheet/storyboard....
ReplyDelete