
However, it offers much more than that! With Google Earth you and your students can take and make interactive, educational virtual tours.
With the Voyager tool you can explore hundreds of pre-made tours and activities.
With the Project tool you can create your own tours by plotting points on the globe to make a 3D geographic tour of a story, historical event, interesting locations, or any concept you are exploring in class. Each location can include additional text, images, videos, links, and more.
I recently recorded a 45-minute training video on making and taking Google Earth tours. See below to view the video, as well as access resources from the session and detailed directions. And if you or your students create a Google Earth tour, please consider sharing the product. I would love to learn from you!
▶️ Recorded Video (45 minutes)
Watch on YouTube at: https://www.youtube.com/watch?v=z9-S_cXXtyY
🧰 Session Resources
- Resource Document - "Making and Taking Tours with Google Earth" - bit.ly/curts-getours
- Slideshow - "Making and Taking Tours with Google Earth" - Google Slide link
🌎 What is a Google Earth tour?
- Google Earth can be accessed at: earth.google.com
- A Google Earth tour is a sequential collection of locations and resources in Google Earth.
- It can be used to tell a story, visit locations from a novel, explore a historical event, learn about different countries, cultures, or biomes, and more.
- A Google Earth tour can contain:
- Locations on the map
- Titles
- Descriptions
- Links
- Images
- Videos
- Custom placemarks
- Street View images
- Information slides
- Lines and shapes
🐘 View a sample tour
You can find and explore sample Google Earth tours in many ways:
Explore tours in the "Voyager" section of Google Earth by clicking on the "Voyager" button in the toolbar on the left. Here you can find tours in the categories including "Nature", "Culture", "Travel", "Education", and more.

You can also explore tours by searching in Google Earth and then choosing "Guided Tours".

There are also lots of tours based on literature and novel at the Google Lit Trips website at: googlelittrips.org

The "TeachersFirst Reading Treks" website at teachersfirst.com/reading-treks has a free collection of virtual field trips based on a piece of literature or text, from grades K through 12.

Finally you can also view tours from links that someone shares with you. As an example I have created a Google Earth tour based on the young adult novel "Small as an Elephant"

"Small as an Elephant" book tour - bit.ly/curts-elephant
- Clicking the link will open Google Earth and load the tour.
- When the tour loads, click the "Present" button to go through the tour.
- You can then use the arrows at the bottom of the screen to move through each location in the tour.
- Or you can click the "Table of Contents" button to see all of the locations and jump to a specific spot in the tour.
- After you are done with the tour, you can access it again in the future by clicking the "Projects" button on the left toolbar in Google Earth.
🛠️ Create your own tour
In addition to viewing existing tours, you and your students can create your own with the "Projects" tool in Google Earth.
- Launch Google Earth at earth.google.com
- Click the "Projects" button in the left toolbar.
- Click the "Create" button or the "New project" button.
- Choose "Create new project in Google Drive".
- You can now click on the project title to edit the title and description.

📍 Add a place to the tour
You can add locations to your tour by searching or by manually adding placemarks.
- While editing your tour, click the "New feature" button.
- Now choose "Search to add place" or "Add placemark".

If you choose "Search to add place" then:
- Type in your search terms and select the desired location from the results.
- You will fly to that location in Google Earth and get a pop-up information card on the right with details about the location.
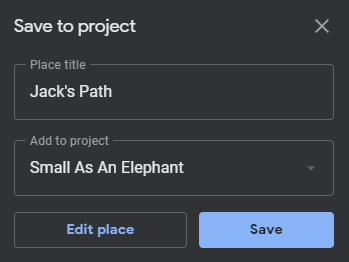
- If this is the location you want, click "Add to project" from the info box.

If you choose "Add placemark" then:
- Navigate through Google Earth to find the spot you want.
- Then click on the location.
- The side-panel will open where you can enter a "Title" for the location.
✍️ Edit a location's details
After you have added a location to your tour, you can edit many details about that place. To begin editing, click the "Edit feature" button (pencil icon) next to the location name in your tour.

Note: If you added a location from a search, Google Earth will have automatically included details about the site. You will want to remove these details so you can manually edit the information for the location. To do this click the "Replace" button in the edit panel.

Photos and Videos - Click the "Add Photos" button to add pictures and videos from an upload, Google Image Search, YouTube, Google Drive, Google Photos, or from a link.

Title and Description - Here you can edit the title and description. The description can include rich text such as bold, italics, hyperlinks, and more.

Info Box - Use this drop-down menu to choose how the details for this location will be displayed. This includes no info box, or a small info box, or a large info box.

Placemark - You can pick a placemark from the small default set of images, or click the three-dots button to select from a much larger collection, or even upload your own placemark image. You can also use the paintcan button to recolor the provided placemarks.

Custom View - You can set the initial view that users will see for this location.
- Use your mouse to move and zoom in and out.
- Switch between 2D and 3D view.
- Drag and drop the "Pegman" icon to access Street View or a Photo Sphere.
- When you have the view you want, click "Capture this view".

Reordering Locations - You can change the order of your locations as needed by dragging and dropping them in the list of locations in the edit panel.

🖼️ Adding Slides
In addition to adding locations, you can also add slides to the tour. These can be used as:
- A title slide or introduction at the start of the tour
- Section breaks throughout the tour
- An end slide with credits or contact information
- And more

To add a fullscreen slide:
- Click the "New feature" button.
- Choose "Fullscreen slide" from the drop-down menu.
- You can now add a "Title", a rich-text "Description", and one image for the slide background.
- When done editing the slide, it can be reordered just like all of the locations in your tour.

🔷 Adding Lines and Shapes
Beside locations and slides, you can also add lines and shapes to the tour. These can be helpful to:
- Plot out a path for the tour
- Highlight a region on the map

To add a line or shape:
- Click the "New Feature" button.
- Choose "Draw line or shape".
- Click on the map to add each point of the line.
- To end the line, press "Enter" after your last point.
- To make it a shape instead, end your shape by clicking back on the first point to close the region.

Either way you will now get a pop-up window where you can name the line or shape, and add it to your tour.
👀 Viewing the Tour
You can view your tour at any point by clicking the "Present" button in the project edit panel.

🔗 Sharing the Tour
You can share the tour for others to view, or to allow others to have edit rights and collaborate with you on building the tour. To share the tour:
- Click the "Share project" button at the top of the project edit panel.
- This will open the normal "Share with people and groups" window.
- Here you can share with specific people, or share the tour as a link.
- If you give people view rights, they can play your tour.
- If you give people edit rights, they can help you create the tour.

Post by Eric Curts
📮 Join the "Control Alt achieve" email discussion group
📰 Sign up for my email newsletter
🐦 Connect with me on Twitter
▶️ Subscribe to my YouTube channel
📧 Reach out through email - ericcurts@gmail.com
📗 Check out my "Control Alt Achieve" book
🏫 Bring me to your school, organization, or conference with over 60 PD sessions to choose from
No comments:
Post a Comment